Wednesday, December 23, 2015

Custom Ewok with Stormtrooper Helmet Ornament

Well, while I was done with Yoda ornament, I was still in the mood for another. I also had all of my tools out on my desk, why not try one more, right?

When I was looking for Stormtrooper helmet references for "Star Wars Deluxe Design a Vinyl Storm Trooper Play Set", I came across an awesome design by SKL0 and I really like it.  I knew that I could utilize that reference and get this custom ornament done ASAP.

By using sharpie, I marked certain areas so that I know where to carve/shave and build up each area. I didn't take that many photos since I just needed to complete this one as fast as I could.

Nest step... Just getting the rough shape in place.

Now a bit more detailed sculpting...

I also baked several "round" black sculpy III for his eye. I must had a dozen different sizes to figure out the best size. It's much easier for me to sculpt around hardened eye for details. I overlaid fairly thin sculpey around his body, feet and arms so that I can put lines as his fur.

Instead of spraying primer, I used Liquitex gesso to prep surface. I must have put good 3-4 layers here.  Now time to paint!


Now it's all done!!!


...now to the 360 view


Close-up/Fisheye view

...and a bonus image with watercolor.


Thursday, December 10, 2015

Custom Yoda Ornament

Here i go again. On the left is a white blank PVC plastic ornament from my work. On the right is the finished custom yoda ornament.

The place I work hosts various fundraiser events. Occasionally they have an event like this and showcase how talented all these artists and designers are with custom toys, shoes, etc. This one is a blank PVC ornament and you can do whatever (and they do!).

Just like any other projects, I sat on it for days and it was in my bag for sometime. I knew it will be another Star Wars theme, but I wasn't able to decide what to do with it.

Once due date was near, i just needed to go ahead and move on.

So here I go! I always liked stylized toy Yoda from the clone wars and found a few awesome references.  So that's what i have decided to make.

Since i will be laboring and sculpting for hours, I need to secure his leg and the head.  I just didn't need these pieces to move around while i was sculpting.

I needed to have some sort of support for his ears since it will be extended more than usual. I have drilled holes for the armature wire to go thru.

I love playing around with Super Sculpey! Sometimes it feels too soft, but I can always come back hours later (or days later) to continue sculpting. I've heard about Super Sculpey FIRM, but never had a chance to use it.

His body didn't too long to sculpt than I thought. I didn't use the arms from the original parts.... they just didn't fit right for what I needed him to do.

I baked his torso first so that I would have a firm grip around his body for sculpting his head.

now this is about 80% done with his face/head. Still missing some details and hair in the back of his head.

now it's all done sculpting and ready for baking!


DING! now his baked and pretty hard (and HOT!). you can see his toe nails is getting a bit brown... that's the result of being baked twice. Small/thinnest part usually get dark if you bake more than once. I actually don't know what would happen if you bake more than twice. It might become brittle... not sure.

I thought i made the hole in his hands big enough, but it wasn't quite big enough for his lightsaber... so i used several drill bits (by hand) to widen the hole. well, i wasn't getting a good grip so i placed the bit on the power drill and tried to go slow........ well, it was way too strong and chipped his fingers and part of his hand!!  You can actually see the damage in the picture. I did consider using the air-dry epoxy (Magic Sculp), but it will take waaaaaay too long to cure it. So i just glue it back.

I think you can paint right after baking it, but I do like to prep the surface by spraying primer or some sort of gesso. I had an used can of gray primer but it didn't have enough to cover entire sculpture, so I primed it again with white.

I only waited about 1/2 day or so to let it dry and start sanding.  You can see some gray showing up. You also see my Yoda toys as reference for colors.

Now it's time to paint!

I'm about 80% done painting the figure...

Since this is an ornament for christmas, I have created standard lightsabers (with glow-in-the-dark paint) and candy cane sabers. White/Red candy cane is made out of Sculpy III.  VERY soft and it doesn't even get extremely stiff when you bake them. You can actually bend it and snap in half.  Not a big fan if you're making something detailed or small.

 Now it's all done!


Oh and since this is for Christmas, he gets a Santa hat too!

...and one more with watercolor.


Tuesday, April 23, 2013

TOMS - Style Your Sole: Boba Fett


VERY time-consuming project... must have taken 20+ hours to complete putting each rhinestones!!

Start with the blank TOMS white canvas shoes.
  

Sketch the outline with a pencil...

Using Prismacolor markers as the base color. It doesn't look too bad as is.  Maybe i should have stopped here... 

 After 3-4 hours putting each rhinestones... I knew then i have hours of work ahead of me.

Now all done!!  Phew!!!


Monday, January 2, 2012

Han Solo Munny in carbonite

Ok, I made this custom munny back in 2009 for the local gallery show and posted pics on flickr... but, i decided to put them on my blog as well.

I know there are million custom munny and dunny pieces out there but i thought mine is unique enough to post the "partial" step by step progress of this project. I say "partial" since i didn't take pictures every step... the reason why is that my hands were pretty dirty from handling sculpey & magic-sculpt and didn't want to touch my camera. You actually don't need to use the Magic-sculpt... but i needed to make this in phases and didn't want to constantly re-bake the super sculpey over and over.

So here i go. I used 4-inch munny since it's small and easy to place in the polymer clay oven.

I bought a cheap wooden shadowbox frame (9"x6"x1.625") from the local craft store. Don't buy anything expensive. You need an unfinished shadow box frame. You're just using it as framework for this project - you want as plain as possible.


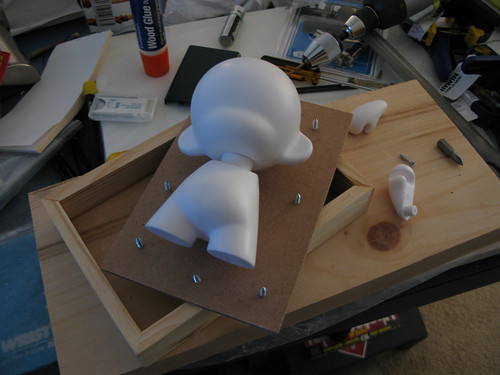
As you can see I simply removed his arms & head and mounted his body and head (a bit crooked) on the backing of the shadowbox. These body pieces are actually screwed onto the board to secure and make them steady.

You see other screws around this body - this is how i filled the rest without using a ton of super sculpey. i use wires and crumpled aluminum foils as a filler (see example).


Now it's filled. If i would have ONLY used the sculpey to fill the back, this piece would weighed a ton more! If you read the baking instruction it will say something about how thick it should be and how long. I never used that much sculpey as a solid mass, i wouldn't know how long it would take time to bake. I don't like a lot of unknowns... i went for the safest way.

I hear some people are not a big fan of super sculpey and would rather use polymer clay such as Original sculpey , sculpey III, or Premo!.. but I've had the best luck with super sculpey. I would stick with this product until i have to use the other one for whatever the reason.

FYI, at this point everything is still soft and flexible, try not to touch the back fill. I added more super sculpey to its body & face and started to sculpt. Once the polymer clay is baked it will be cured and hardened. Then you can sand, drill, carve, and painted. Having said that, i would sculpt and make the details as much as possible before baking. You can re-touch and re-adjust as your heart desires while it's still soft. I really think it's much easier to do this now than using Dremel with fine carving/drilling tools later.


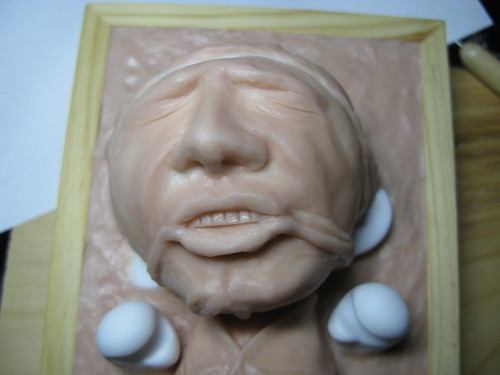
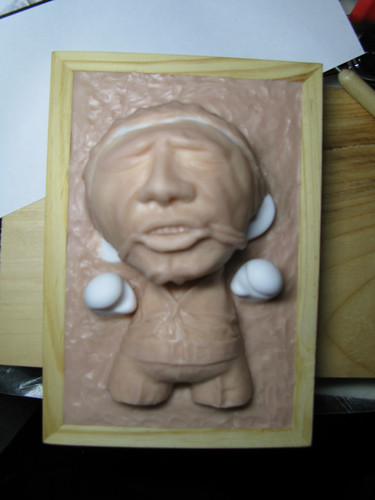
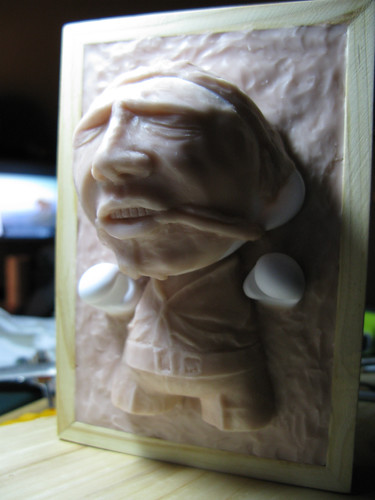
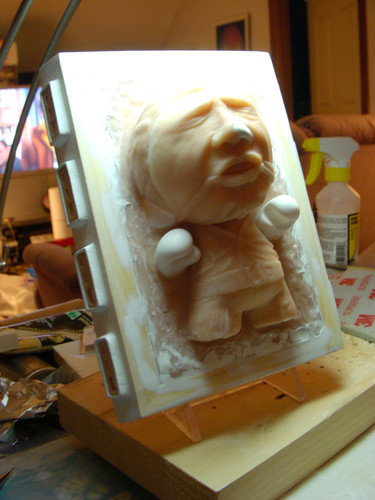
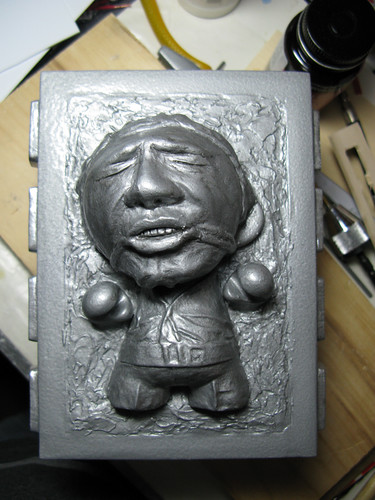
Here is the close-up of Han Solo's face.


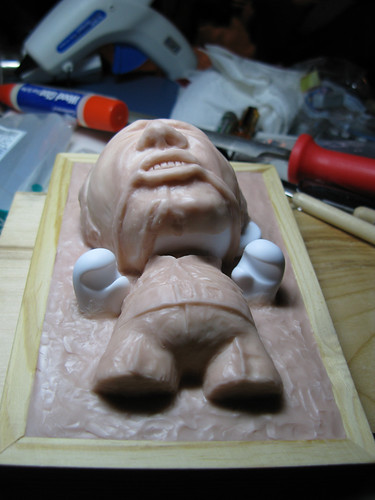
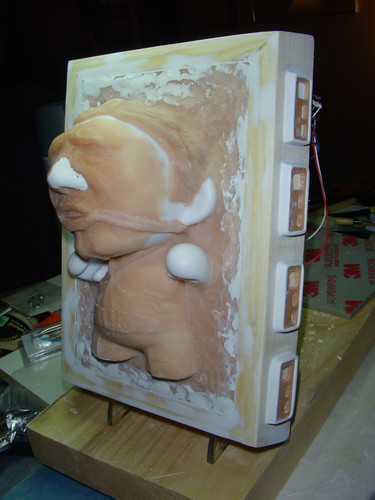
...and another view - from the bottom.


...and one more view. It's ready to bake him good :)


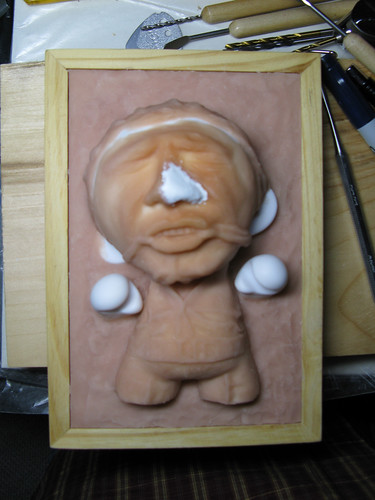
When i took him out of the oven, i noticed one side of his nose was dented and deformed!!! I must have bumped his nose on the heating element when i was placing his inside. What a surprise!! I actually didn't want to re-bake the clay again, I decided to use Magic-Sculpt which is an air-dry, 2-part epoxy clay. I shaved the deformed portion and added the clay over the cured super sculpey. You just need to let it dry overnight.


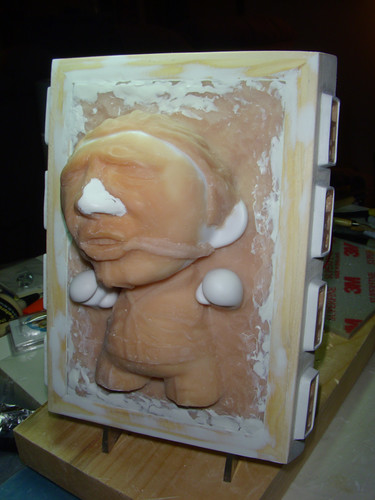
Super sculpey does shrink a bit when it gets baked... so it did create hairline gaps between clay and wood frame. I used the magic-sculpt to fill the gaps.

I also shaved the outer edges of the wood frame so that it gives a bit of an angle. Filed & sanded so that i can add and build the side control panels.


I got ahold of a tiny light assembly from a greeting card. Once it's activated, these lights start flashing and goes quicker & quicker... then it stops. Well this is perfect for this project. Just like when Boussh (Princess Liea's disguised as a bounty hunter) pressed the button to release Han from the carbonite freeze, it flashes and gets faster and faster. The carbonate melt away (very cheezy scene i must say) then Han falls on the floor.


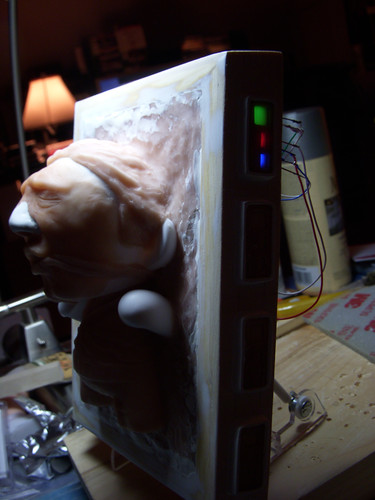
I really didn't spend that much time building the side control panels. I used super sculpey to build 8 similar control panel facing plates and used magic-sculpt to put them on the side frame. As you can see, the top right control panel is slightly different. I placed a thin white plastic sheet first and drilled/chiseled the frame from the back so that i can insert the these lights.


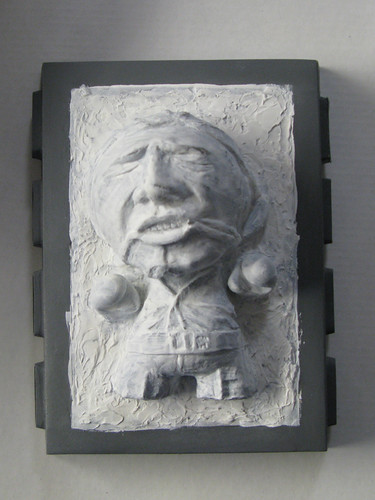
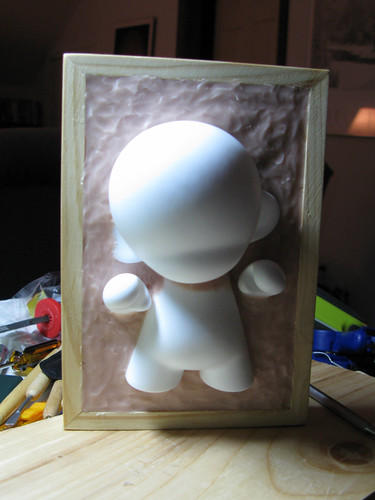
This is after i sprayed a primer and a few additional layer of preparation. I wanted to have the different texture from the frame, so I put some liquitex gesso and some modeling paste. Now to the final paint.


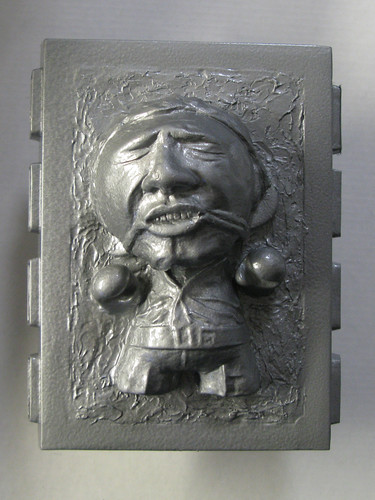
I found a can of spray that mimics the hammered look. It's called Rust-O-leum "Hammered Spray". I did some test spray and it looked great. This is exactly what i was looking for. I'm not a big fan of mixing different brands of spray, but i don't think Krylon offered the similar spray.


Everything looks great but I added highlights... well, darken the crevices by painting very watered-down black liquitex acrylic paint and wipe the area with a paper towel. This will leave the paint in the crevices. You can spray the fixer, but I kept it as is.

That's it!!!