On the left is the clear plastic ornament for $1 at the local craft store (pat catan's). On the right is the finished custom "death star" ornament.

Here is the clear ornament untouched, ready to find the center point of this so that i can slice it in half horizontally.
I simply eyeballed and did the best i could to find the half-way point so that I could split the ornament into two equal hemispheres. I wish there was an easier way without buying other craft tools. Make sure it's perpendicular - so draw a line with a sharpie, or place a thin masking tape so that you can use it as your guideline.

Here is my favorite tool - Dremel. I attached a circular cutting blade and started chopping it in half. This plastic ornament is pretty thin and flimsy once you start cutting. make sure that the blade is in deep enough and fast enough to cut the entire thing without getting caught on the rough edge.
Once it's done cutting i used sand paper to smooth the edges. I usually do this every step by using sandpaper, sand paper sponge, or a small metal file to remove any sharp/rough edges.

Now to the superlaser dish... switch the circular blade to any drill bit to make the pilot hole. I used 1/8" drill bit, i wouldn't use anything larger than that. Once the pilot hole is drilled, i switched the drilling bit to a silicon carbide grinding stone and let the drill bit go through the entire hole. This grinding stone should leave the edge of the hole fairly smooth and you might not need to sand it at all. Now this hole is a perfect size to put the circular blade's stem*.

Put the circular cutting blade back on to make the superlaser dish. The easiest way to do this is to put the blade's stem in the ornament hole first then lock the blade into the Dremel. Yes, this sounds weird but this is how i was able to manage making the circular dish. Turn the dremel on and keep both the ornament and dremel steady and pull the dremel out. Don't use the slow speed, it will melt. you want to do this as fast as you can. MAKE SURE you don't throw away the piece you just pulled out. You will be using this piece later.
As i mentioned earlier, this plastic ornament is pretty thin and flimsy. I needed to strengthen the ornament so put the laser dish back on and put the 2 sliced pieces together. I initially wanted to use the oven-bake clay (sculpey - my favorite!), but i was quite sure that this plastic ornament will melt in the oven. So, i decided to use 2-part epoxy putty called "magic sculpt". This putty/clay comes in handy since you need 2 parts to get hardened and air dry. You can use water to smooth out the surfaces while it's still soft.
I have placed a thin layer throughout the inside of both pieces. I tried the best to spread the clay evenly so that it wouldn't be off-balance when you hang it on the tree. Make sure that you apply a touch thicker putty behind the laser dish. Once you have the putty inside of both pieces, you can reverse the piece you drilled with the circular wheel and place it over the putty.

Now, grab more putty, mix and place it in the edge of the bottom piece. I didn't use the top piece to do this since you just placed the laser dish and i'm sure it's still soft and flexible. You are only doing this to put the 2 pieces together. Make it's somewhat soft and sticky, add extra water if needed.

Place both pieces together but you will need a gap for the trench. I used 4 exacto blades - but you should at least use 6 blades to make the gap evenly throughout. You can use paperclips or other materials... you just need to be able to pull them out the next morning. Now it's time to let it harden over night.
Once this is all hardened, you should be able to pull those exacto blades. Grab a small amount of putty together and fill holes that were created by blades. You can actually water down the putty and squeeze it in with your finger and nails. this shouldn't take much time to harden. You don't really have to wait overnight for it. Maybe a few hours at the most.

Now it's time to sand and make the ornament as clean as possible from any excess putty, rough edges, etc. I used combination of 220 and 320 grade sand paper/sandpaper pads.
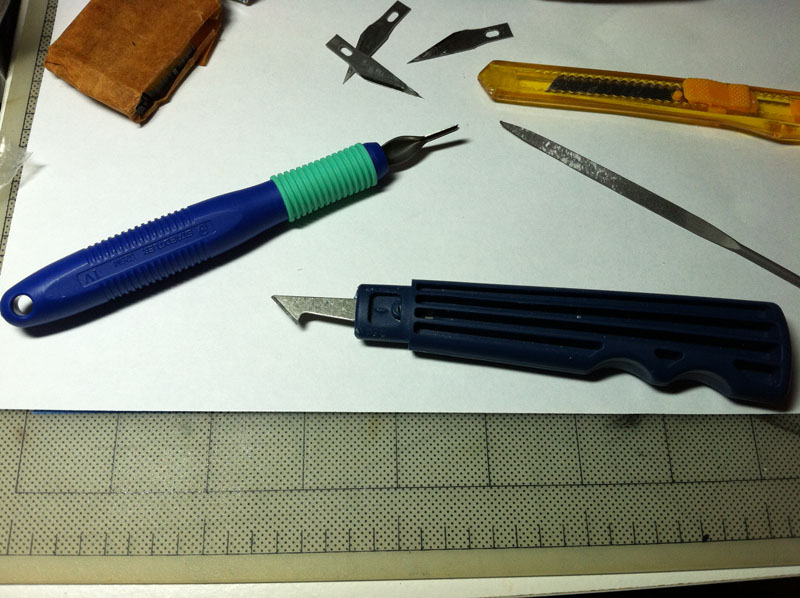
You will want to pay attention to the trench groove. I used a tool that i found sometime ago and i have no idea what this thing is called or where i bought it. You might be able to use concave x-acto blade or slimmest carving tool. You just need to be able to get the trench a bit deeper and make it even.

I'm a big believer of primers. Any craft work with a paint job involved, i use Krylon's primer. Very fast drying and evenly sprays. I usually have good luck with this product.

Let this primer dry for an hour or two and you're ready to sand again. Sand the entire surface and wipe it with a damp paper towel.

This is not important, but me being anal i used black Liquitex acrylic paint to get the maximum darkness for the trench. I used one of the thinnest paint brushes and painted the groove black.

The base color is silver. Since the ornament is fairly small, you don't need a full size can. I just bought one of those half size silver spray can.

One tiny trick spraying this silver paint - just don't spray straight onto the trench. you actually don't want this silver paint to cover the groove so just don't spray straight on.
According to the spray can, you should let it dry for 3 hours.

Now time for masking. I usually use Scotch's Painter's blue tape. I know there are many pin striped masking tapes for modeling and other craft project. This tape is readily available at the local home improvement stores or even at drug stores. I know it comes in different widths, but i like using thick ones and just slice it in any width. I pulled a long strip first on the cutting mat, then made about 8mm width for the first masking job over the trench. Then the rest of the masking is about 4mm in width and are placed over the ornament. Since this is circular in its shape, the masking tape will not lay all flat. I wouldn't worry too much since it will be sprayed with the glitter and it will still make nice straight lines.


Now you're ready for the final paint. I used Krylon's Glitter blast spray paint. I picked up "sliver flash" color which worked out great with the base color.

Make sure you don't over spray this glitter paint, just enough to cover the surface along with the masking tape. If you can't see the masking tape, you have over-sprayed too much... which i did for the 2nd ornament i created :(
You're not supposed to handle the surface for 24 hours, but you can actually start peeling the masking tape off carefully as long as you let this dry overnight.

Now you can put the top back on and it's all done!
To add an uniqueness to this ornament, i designed a quick custom wrapping paper. Initially this thing was created for our holiday ornament exchange party and wanted to finish it with all star wars theme :)

I repeated this pattern to fill the 11x17"canvas and printed on the laser printer. the box to this ornament is just small enough so that i wrapped it entirely.


I actually made 2 ornaments separately. The original piece was "taken" by a buddy at the ornament exchange party.... and the other was given to another friend of mine at work the following week since she didn't get it for her son at the ornament exchange.
I hope they are both happy :)
Yays! Your blog is live!
ReplyDeletegreat job looks easy but I'll have to really sweet talk my dremel
ReplyDelete